To open the Symbol Editor, press the
Symbol
button
in the corresponding Object, Relationship, or Role
Tool (in the Port Tool, the Symbol button is disabled as Ports do not have their
own symbols). You can also open the Symbol Editor for a type from almost any
place where that type is displayed in a list, by selecting Edit Symbol from the
type’s pop-up menu. In a Graph Tool’s Types tab and Bindings tab,
and in the Diagram Editor sidebar in the tree view or the top row of the
property sheet, Shift-double-clicking the type will also work.
As a result of any of the above, a Symbol Editor opens
showing the symbol of that type as in
Figure
3–1 (if no symbol has yet been defined for the type, the editor will
initially be empty).
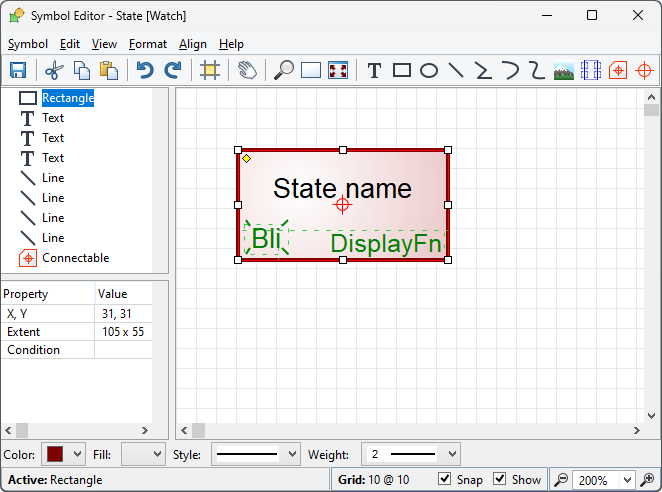
Figure 3–1. Symbol Editor.
The Symbol Editor window
can be divided into seven parts. The usual menu bar can be found from the top of
the window. Below the menu bar, there is a toolbar with action buttons (see
Section
3.1.1) for
Save,
Cut,
Copy,
Paste, Undo, Redo,
Align to Grid,
Scroll and
Zoom commands (
Set Zoom,
Default Zoom and
Zoom to Fit), as well as the tool buttons for creating various symbol
element shapes (see Section
3.2). The
largest part of the window, the drawing area that contains the symbol elements,
lies in the middle. On its left side there is a side bar that contains a tree
view of all this symbol’s elements, and a property sheet showing the
formatting of the currently selected element. At the bottom of the window, there
is a formatting bar for symbol element properties like color, line style and
weight, and a status bar showing information about the currently selected
elements and grid and zoom settings. When certain tool modes are active (like
when editing a template layout), the status bar may provide additional tool info
and a link to the tool’s
documentation.