3.4 Symbol Editor for Roles
The Symbol Editor for Roles
works
similarly to the normal Symbol Editor, except for a few details presented in
this chapter.
The Symbol Editor for Roles has a line coming from the
left side of the drawing area. This line represents the role line coming from an
imaginary relationship left of the picture, and ending at an imaginary object in
the center of the picture. The role symbol should be defined relative to the end
of the line, because the end represents the position where the role line will
stop as it connects to the object symbol. Symbol elements should not normally be
placed to the right of the end of the line, as they would then be on top of the
object symbol. The symbol should look as it would when pointing horizontally
from left to right: role symbols are rotated according to the angle of the role
line.
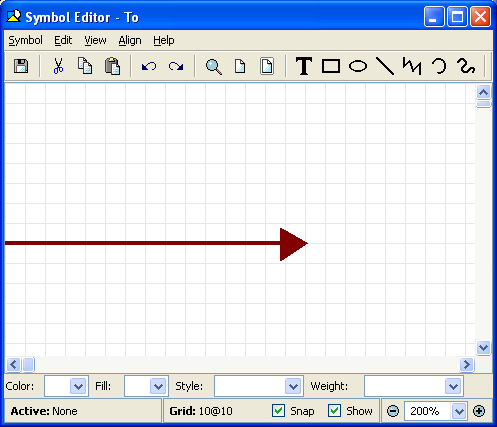
Figure 3–16. Symbol for a ‘To’ role.
There
is no need to define Connectables for role symbols, and thus there are no
toolbar buttons for them. Otherwise the Symbol Editor for Roles works as an
ordinary Symbol Editor.
Setting role line properties
To change the appearance of the role line, select
Edit |
Format Role Line... from the menu bar or press
Ctrl+R. This will open
the Format Dialog with a Line and Fill settings tab (see Section
3.2.1 for more information).
Aligning elements according to the role line
To align an element precisely with the end of the role line,
select the element and then select Align | To Role Line End (or press
Ctrl-L). The midpoint of the right hand side of the element will be
aligned with the right end of the role line.
Rotation
When building symbols for roles, you must take into account
the rotation of role symbols with their lines. For most elements there are two
options for rotating: a true rotation along the role or just moving around the
line without rotating. The text fields are an exception to this: as text is only
printed horizontally, they can not rotate.
To set the rotation behavior of an element, open the
Format Dialog for it. Open the Rotation tab and check or uncheck the
Allow element to rotate box as needed.
As an example, imagine a low, wide element above the end
of the role line. In a role that points down in a diagram, that element will
always be to the right of the role line: its center point has been rotated
relative to the end of the role line, just like the role line itself. If the
element is set to rotate, it will now be tall and thin. If the element is set
not to rotate, it will remain low and wide, and thus may even partially cross
the role line. Such effects must be taken into account with elements that do not
rotate, and are not roughly as wide as they are
tall.


