4.1.5 Viewing and formatting
Hiding and showing objects and
relationships
The View function allows you to concentrate on different
aspects of diagrams by hiding or showing selected object or relationship types.
The menu selection
View | Selected... opens a selection dialog, as in
Figure 4-19, allowing you to choose the
object and relationship types to be shown.
To select object or relationship types to be viewed mark
them with a tick ‘ü’. For
example, according to the selection dialog below all components of the
WatchApplication diagram are shown.
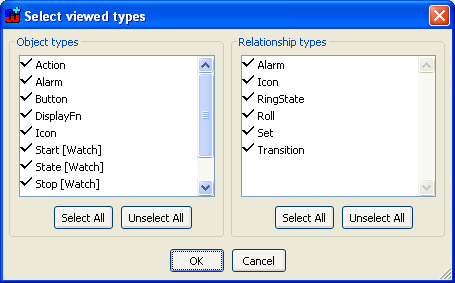
Figure 4-19. A dialog for selecting object and relationship types to be shown.
Relationships
involving hidden objects are only shown if they also involve at least one object
that is not hidden.
Figure 4-20 shows
the result of hiding State objects in a Watch Application Diagram. Note that
this example is intended to highlight how the hide functionality works: more
sensible choices of objects to hide here would be the black Action and Variable
objects.
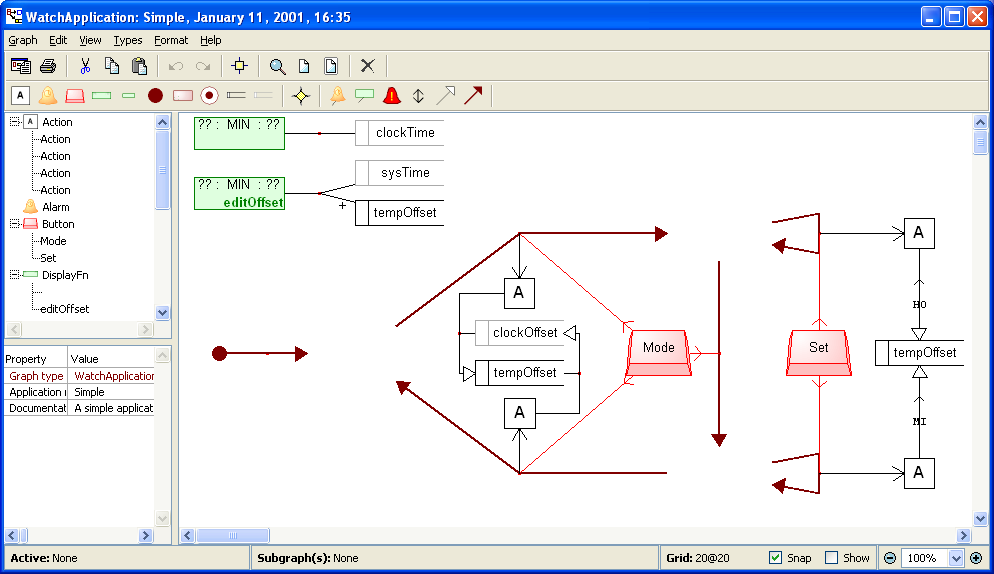
Figure 4-20. An example of hiding objects.
Similarly,
View | All shows every object and relationship of a diagram. Hence, this
command automatically selects every object and relationship type in the
selection dialog (
Figure
4-19).
Zooming
The use of large diagrams necessitates that they can be
displayed at different scales. In Diagram Editor there are several ways to set
and alter the scale factor. To set the zoom to a fixed percentage:
| 1) | Open
the Zoom Dialog (Figure 4-21) by
selecting View | Zoom.... |
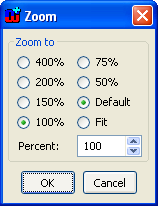
Figure 4-21. Selecting the zoom level.
| 2) | Select
a predefined zoom level, default or fit zoom or set the zoom level into the
Percent
field. |
| 3) | Press
OK. The diagram will be shown scaled to the selected
level. |
Alternatively, you can select a
predefined zoom factor, fit or default zoom from the zoom pull-down list located
at the lower-right corner of the Diagram Editor window. You can also enter a new
zoom value if needed. Pressing the + and – buttons on the
either side of the pull-down list will increase or decrease the zoom factor by
one unit. Default and fit zoom can be also set by pressing the respective
toolbar buttons.
It is also possible to zoom freely on the defined area. In
order to do this:
| 1) | Select
the Zoom tool from the toolbar (a magnifier glass cursor will be shown when the
zoom tool is
active). |
| 2) | Move
the cursor on the drawing area, press and hold down the left mouse button and
drag the mouse over the area you want to zoom
to. |
 | During
the area zoom, hold down the Ctrl-key to zoom out instead of zooming in.
The zoom out factor will be calculated as the relation between the selected area
and the whole drawing area. |
You can also
zoom in and out directly in the drawing area by holding down Alt and using the
mouse scroll wheel. The current zoom level is shown in the status bar at the
bottom of the Diagram Editor.
Grid and aligning elements
To help make your diagrams look neater, MetaEdit+ can show a
grid over the diagram, to help you align objects with it. The size of the grid
is controlled through the
View | Choose Grid... dialog. The command
View | Show Grid or toggling the
Show checkbox on the status bar
at the bottom of the window allows you to show or hide the grid in the diagram.
Merely showing the grid does not affect object placement, however; the command
View | Align to Grid aligns
the selected object
and relationship centers and role break points according to the selected grid.
If there is no selection, all elements are affected.
Align to Grid is
also available as a button in the toolbar.
You can force the use of the grid when elements are
created or moved by selecting View | Snap to Grid or checking the
Snap checkbox at the bottom of the window. The centre of individual
elements and role break points will be aligned to the grid in all operations. If
multiple elements are selected and moved, they will maintain their relative
positions to each other, and the whole area will maintain its relative offset to
the grid. Thus elements that were previously aligned with the grid will still be
aligned after the move.
As with zooming you can also access the grid setting
through a pop-up menu by pressing the right mouse button when nothing is
selected in the diagram.
Refreshing the editor window
With its tidy drawing operations, forced refreshing of the
Diagram Editor window is not needed very often. However, refreshing the display
is needed when changes made to the conceptual graph by some other editor need to
be propagated to the currently open diagram. Similarly, changes made to the
underlying metamodel also require forced refreshing. The display can be
refreshed by choosing
View | Refresh or pressing
F5.
Scaling objects and relationships
You can scale an object or relationship symbol by selecting it
and dragging any of the selection handles at its corners or the midpoints of its
sides. Holding Shift down will maintain the aspect ratio of the symbol.
Holding control down will scale the symbol keeping the point opposite the
dragged selection handle in the same place. Without control the centre of the
object is maintained in the same place, as this best maintains the layout of the
diagram – keeping the object on its grid point and keeping role lines at
the same angle.
To set a particular scale, or scale several elements with
the same scale factor, choose Scale symbol... from the element’s
pop-up menu or from Format menu. The Scale Dialog that opens will
initially show the current scale of the (first) selected object. Pressing
Default will remove any scaling, returning the elements to their default
size.
Ordering objects
The diagram elements appear on Diagram Editor in the following
order: roles are displayed over relationships, which are displayed over objects.
Whilst ordering amongst roles and relationships is automatic, the order of the
objects is user definable. To re-order objects:
| 1) | Select
the objects to
move. |
| 2) | Select
an ordering command (Bring to Front, Send to Back, Bring
Forward, Send Backward) from the Order submenu of the pop-up menu or
the Format menu. You can also use the following keyboard
short-cuts: |
Note that
Bring to Front will only make this the
uppermost object: it will still be below all relationships and
roles.


