4.3.1 Tables
Opening tables
To open a Table Editor:
| 1) | Select
Edit | Table Editor in the
Launcher. |
| 2) | Select
a graph (e.g. ‘AlarmClock’) from the list (Figure 4–44), and click
OK. |
| 3) | Select
the desired representation from the dialog that appears, and click OK. If
you want to make a new representation select ‘Create new Table’.
This selection opens the selected graph but allows you to make a different
representation version of it. Thus, you can choose a different object type to
show, or a different order and subset of the objects in the
graph. |
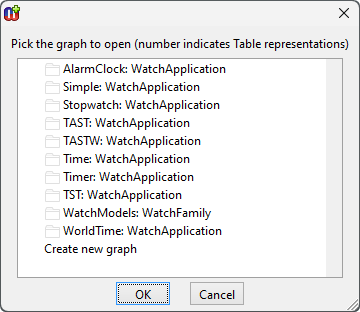
Figure 4–44. Dialog for selecting graphs.
 | The
dialog for representation selection does not necessarily appear. It depends on
the representations available and the current dialog options (see Section 3.1.3 Options
Tool). |
| By
keeping Shift pressed during the open operation, you can open the graph
without locking it. This is especially useful in a multi-user environment when
you just want to view the graph and allow another user to change it at the same
time. |
As a result, you should now
have a Table Editor open on the selected graph. The Table Editor will open sized
to show the whole table if possible. There are also many other ways to open a
table, e.g. selecting a graph and choosing
Open As Table... in a browser,
selecting
Graph | View | Open as Table... in another editor, or selecting
an object in another editor and choosing to open its
subgraph.
Creating tables
To create a new table:
| 1) | Select
Edit | Table Editor... in the
Launcher. |
| 2) | Select
the last item, ‘Create new graph’, from the dialog (Figure 4–44), and click OK.
|
| 3) | As a
result a dialog appears asking you to select a graph type and the
representation. Choose a graph type, check the Table radio button and click
OK. |
| 4) | Next
a property dialog opens for the new graph. Fill in the properties and press
OK. |
| 5) | If
the selected language has multiple object types, the
Table Editor asks which object type should be shown in the table. E.g. when
creating a table for a Data Flow Diagram the editor asks to select the object
type: ‘Process’, ‘Data store’, or
‘External’. |
After you have
answered these dialogs, an empty Table Editor will open on the new
graph.
Managing tables
As in all editors in MetaEdit+, the Graph menu allows
users to create, open and edit graphs. For example, the same function that was
previously used to open a table can be accessed in the Table Editor from
Graph | Open... as well. Similarly, a new table can be created by
selecting Graph | New... and following the instructions above.
To edit the properties of the graph itself select
Graph
| Properties... and a property dialog for the graph will appear. In the
dialog, the properties of the graph can be edited and modifications accepted by
clicking
OK. See Section
3.3.1
for more information on property dialogs.
To access the Info Tool for the graph, select
Graph |
Graph Info... (see Section
3.3.3).
For element info, select
Edit | Info....
The Graph menu also includes functions to view the graph
shown in this table in other tools of MetaEdit+. The functions in the
Graph |
View submenu open this graph in the chosen editor or Graph Browser.
Printing a table
To print the table select
Graph | Print.... You are
first asked for the printer, then for the scale of the printout or how many
pages you want to print over. By default, printing is of the whole used area of
the table on a single page. Printing is described in more detail in Section
5.1.
Often, a better option than printing for large tables is
to export the table to a word processor or spreadsheet, as described below, and
format and print it from there.
Generating code and documentation
To generate code or documentation:
| 1) | Select
Graph | Generate....
|
| 2) | Choose a
generator from the list dialog and press
OK. |
After you have selected a
generator, the tool runs it and opens a window showing the generator output, or
a list of the file(s) to which generator output has been
sent.
Exporting a table
To export the table as tab-separated ASCII or as an HTML table
select
Graph | Export to | ASCII Table or
Graph | Export to | HTML
Table. These export functions open a generator output tool from which the
table can be saved into a file or copied directly into an external program, such
as a word processor, spreadsheet or HTML
editor.
Closing a Table Editor
To exit the Table Editor select
Graph | Exit or use
some other platform dependent closing mechanism: e.g. on Windows, click the X in
the top-right corner of the
window.


