4.3.4 Viewing and formatting
Viewing a table
The
View | Selected... command allows you to hide or
show selected properties of elements by hiding or showing columns of the table.
Hidden properties are also omitted from the printing functions.
View |
Selected ... opens a selection dialog like that in
Figure 4-43, allowing you to choose the
properties to be shown in the table.
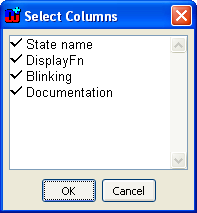
Figure 4-43. Dialog for choosing properties to be shown.
To
show all properties of the objects, select View | All.
Sorting a table
The table can be sorted by
Format | Sort....
Figure 4-44 shows a dialog for selecting
the sorting rules. It is possible to set up to three criteria for sorting as
well as the sort order (i.e. ascending or descending) for each. It is not
necessary to define all criteria, as the empty ones are ignored when sorting.
These rules are remembered as long as the Diagram Editor stays open, but closing
the editor will discard them.
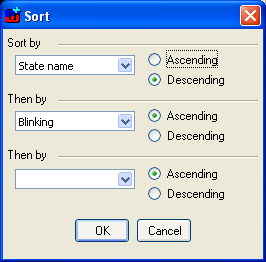
Figure 4-44. Sort table dialog.
Setting column widths
Column widths of the table can be adjusted in two ways. The
first way, Format | Autowidth, adjusts all column widths according to the
longest values of properties on columns so that they can all be seen. This
functionality can be accessed from the toolbar as well.
 | The
second way, Format | Widths..., opens a dialog for setting each column
width. Figure 4-45 shows the Column
Widths Tool start and end show which columns the setting
will affect. You can set the width with the slider, which is to the same scale
as the actual column width. If your column is wider than the dialog, you can
make the dialog wider by dragging the bottom-right resize corner; you can also
type the width in pixels directly in the Width box. To apply your changes press
Save & Close. You can make changes to multiple ranges by pressing
Save and then selecting a new range and width.
|
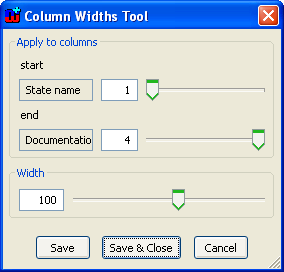
Figure 4-45. Column Widths Tool.
Showing the whole table
The View | Fit Window to Table command (also available
on the toolbar) scales the window to show the whole of the table. If the table
is larger than your screen, your operating system may force the window to be
smaller than the table.
Setting fonts
In some cases, it may be necessary to set the font of the
table. For that purpose, Table Editor offers a tool for selecting fonts. To do
this, select Format | Font... and choose the font from the dialog that
opens. The fonts available are generic descriptions, rather than specific fonts
available on your computer. Using specific fonts would result in problems when
moving to a different computer or platform with a different set of
fonts.
Refreshing the Table Editor
Refreshing the table is needed when changes made to the
conceptual graph by some other editor or changes made to the underlying
metamodel need to be propagated to the currently open table. To do this, select
View | Refresh (or press F5).


