3.2 Creating symbols
As Person is a concept we are going to use in our
graphical representations of family trees, we need to define a graphical symbol
for it. You can start the Symbol Editor by pressing the Symbol Editor
button in the Object Tool toolbar. As creating good looking symbols from scratch
may take a while, we skip some dirty work here this time and load the symbols
from a symbol library.
In the Symbol Editor, select
Symbol | Browse
Library..., choose the symbol called ‘Person’ from the list and
press
Paste & Close. After this the predefined symbol template is
pasted into the editor. Its elements are currently selected so that they can be
moved around with the mouse. Move the elements to the position you like and
press the left mouse button. Please note that after this the elements still
remain selected, so you may want to deselect them by clicking left mouse button
somewhere on the unoccupied drawing area. The editor should now look like
Figure 3-5.
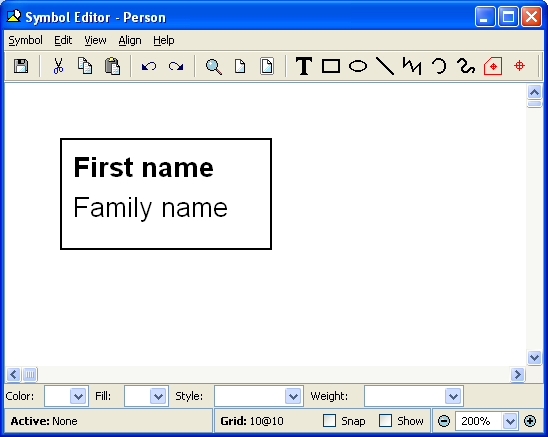
Figure 3-5. Symbol Editor with predefined Person symbol loaded.
We
must, however, link the ‘First name’ and ‘Family name’
text fields to the corresponding properties we added to our
Person
object. Click the text ‘First name’ and press the right mouse
button. The text field gets selected and a pop-up menu will be shown. Select
Format... from the pop-up menu as in
Figure 3-6.

Figure 3-6. Formatting a text field.
A format dialog for
the text field will open. Currently, the text field is showing the fixed text
that is entered into the text box in the middle of the dialog. However, what we
want to do is to make the text field show the value of the ‘First
name’ property instead. To do this, click the
Property radio button
and choose ‘First name’ from the pull-down list next to it, as in
Figure 3-7. Accept these changes and close
the format dialog by pressing
OK. The name of the selected property type
now appears in the text field. In a similar way, set the content of the lower
text field to be ‘Family name’.
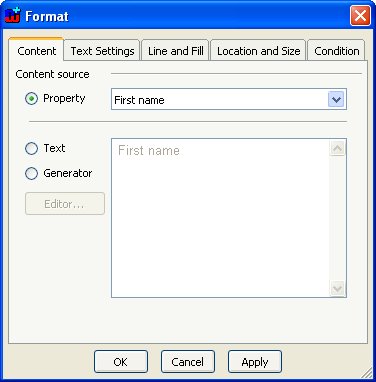
Figure 3-7. Format dialog for a text field.
After assigning
the properties to the text fields, there is still one more thing to do. We must
define the connectable area for our symbol, i.e. a perimeter the incoming
connection lines will stop at. In this case the default connectable is suitable
for our purposes, so you can let MetaEdit+ generate it for you by selecting
Symbol | Save or by pressing the
Save button in the Symbol Editor
toolbar. A connectable will appear around the symbol elements as in
Figure 3-8.
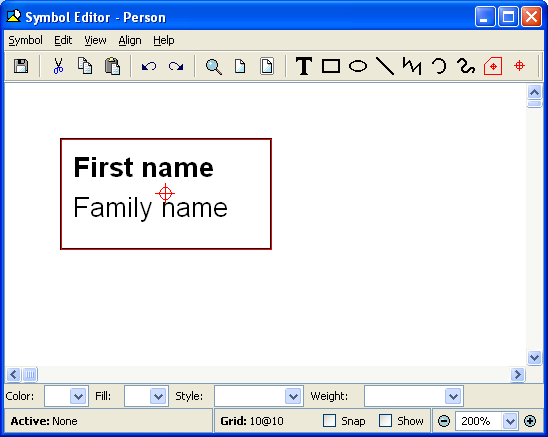
Figure 3-8. Symbol Editor with complete Person symbol definition.
The
symbol is now ready and saved, so you can close the Symbol Editor by selecting
Symbol | Exit or closing the editor window. You can also close the Object
Tool.


