3.1.1 Startup Launcher
When MetaEdit+ is started it first opens a Startup
Launcher
as shown in
Figure 3-1. With this tool you can start
the login process
, set names and directory paths for the
repository, make backups of the repository, or file in patches. Some of these
functions are related to the management of the repository, and are explained in
more detail in Section
6.1 and in the
‘MetaEdit+ System Administrator’s Guide’. Here we describe the
login process, user reconstruction, and how patch files can be loaded into
MetaEdit+.
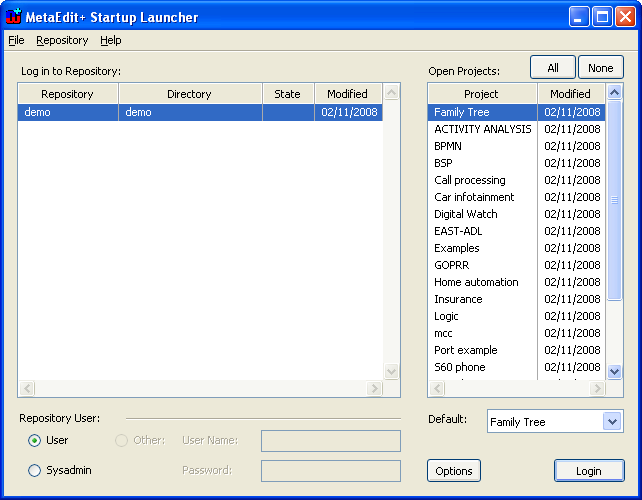
Figure 3-1. Startup Launcher.
Login and opening the repository
The main function of the MetaEdit+ Startup Launcher is to
allow you to log in to a repository. You choose the desired repository, user
name, projects to open from that repository, and default project. Initially, the
most recently used repository and user are selected. In the projects list, the
most recently used projects are selected and shown at the top of the list. You
can sort the list by name or date by clicking the column headers.
In most cases, you will only need to use the login
function of the Startup Launcher. To login:
| 1) | Select
the repository you want to log in to from the ‘Log in to
Repository:’
list. |
| 2) | Select
the projects you want to open from the ‘Open Projects:’
list. |
| 3) | Provide
the Repository User details in the ‘Repository User:’ pane. Normally
you will just choose User, or Sysadmin if you need system administrator rights.
|
| 4) | Press the
Login
button. |
| | If
the login fails, you will be told the reason and you can try again or
‘Reconstruct’ the repository as appropriate. If the login fails
because the number of users logged in equals the limit of your server license,
you will see the message ‘Login is not allowed
now’. |
| | During
loading, a progress bar and a repository transcript will be shown (Figure 3-2). |
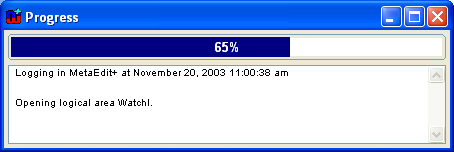
Figure 3-2. Progress bar and repository transcript.
Exiting without logging in
If at some point you wish to exit MetaEdit+ without logging
in, simply close the Startup Launcher.
User reconstruction
In general, MetaEdit+ handles most
problem conditions automatically. Hardware and software
failures can however cause the repository to end up in an inconsistent state.
For these purposes MetaEdit+ offers the Reconstructor tool. Use of the
Reconstructor is described in more detail in the ‘MetaEdit+ System
Administrator’s Guide’: here we just describe how users can
reconstruct their user information, so that they can log into the single user
version after a crash.
You will be informed of the need for user reconstruction
when logging in: a dialog will inform you that another user is already using the
database. In the simplest cases, you will just be asked whether you want to
automatically reconstruct and continue with your login. If this is not possible,
you can rebuild the user information like this:
| 1) | Select
the repository to reconstruct from the
list. |
| 2) | Select
Repository | Reconstruct Repository... from the menu (or Reconstruct
Repository... from the repository list’s popup
menu) |
| 3) | Enter
your user name and
password. |
| 4) | Press
OK. |
Next a dialog opens describing the
current user information.
Figure 3-3
shows an example of the user information dialog: ‘user’ is still
logged in, or the system has crashed while he was logged in. The user
information dialog lets you choose whether you want to reconstruct user
information or exit (because someone else is indeed logged in).
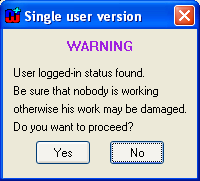
Figure 3-3. Warning about database state when reconstructing.
| 5) | Click
the Yes button to proceed with
reconstruction. |
Next MetaEdit+ opens a
Database recovery window (
Figure 3-4).
This contains a set of radio buttons for selecting actions, and lists of users
and areas (projects) to apply the chosen action to.
To carry out user reconstruction:
| 6) | Click
the user reconstruction radio
button. |
| 7) | Select
the user name you logged in with (Figure
3-4). You can only reconstruct users in bold: if you logged in as a
non-system administrator user, you can only reconstruct your current user.
Users’ names marked with an asterisk * indicate that those users are
apparently logged in, e.g. because they were logged in when the database
crashed, and thus need
reconstructing. |
| 8) | Click
the Apply
button. |
| 9) | Close
the recovery window by clicking the Quit
button. |
Now you can login to the repository
from the Startup Launcher.
Figure 3-4. Database recovery window.
Filing in patches
MetaCase is continually improving MetaEdit+. Rather than
always distributing a complete new version of MetaEdit+, it is sometimes more
convenient to release smaller sets of improvements as MetaEdit+
patch
files
(
*.mep). Please note that the patches
are version dependable, so make sure that the patch file is applicable to your
version of MetaEdit+.
Patches are loaded at the beginning of each MetaEdit+
session. There are two ways to load patches
to MetaEdit+
environment. They can be loaded with the ‘File in Patches’ operation
from the Startup Launcher, or be given as a parameter on the command line when
MetaEdit+ is started.
To use the ‘File in Patches’ operation select
File | File in Patches... from the menu. This opens a file dialog that
allows you to browse and load patches (
Figure 3-5).
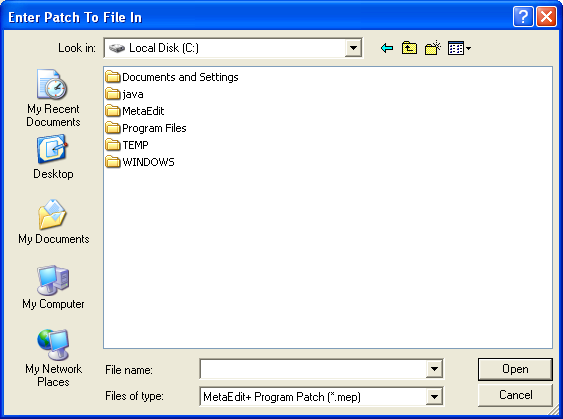
Figure 3-5. File list for filing in patches.
To file in
patches, locate the desired patch file, select it and press Open.
Remember to load patches in the right order (increasing date, or on the basis of
some other advice given with the patch files).
To load a patch file from the command line, modify the
MetaEdit+ start-up command to look like follows (change the name of the
MetaEdit+ executable and patch file as required):
metaedit fileInPatch: patchfile.pat
There is no
option to save patches with the image, but loading them from the command line
provides a work-a-round for make them applied runtime.
Change of repository location
To use an existing repository with MetaEdit+, simple copy it
(i.e. the repository directory with its contents) to the MetaEdit+ home
directory – the repository will appear on the Startup Launcher’s
repository list when you nest time start MetaEdit+. Orthogonally, when you
remove a repository directory from MetaEdit+ home directory, it will be removed
from Startup Launcher’s repository list. Before moving or removing a
repository, make sure that there are no users currently logged
in.
For more detailed information about accessing and managing
repositories, please see ‘MetaEdit+ System Administrator’s
Guide’.
Creating new repository
To create a new repository
select
File | Create Repository... from the menu. You will be prompted for the
repository name, path, and the name and password for the system administrator
(which you can choose freely). Note that this repository is totally empty: there
are no m
odels, no metamodels, and not even any
projects. You should thus normally create another non-sysadmin user, and at
least one project. In addition, you should choose which users have the right to
metamodel, and set appropriate fine tuning settings for the users: see the
‘MetaEdit+ System Administrator’s Guide’ for more details. The
new repository will be added automatically to the databases roots file, which
stores the list of available databases.
Options
From the Startup Launcher it is also possible to set various
preferences and options for the MetaEdit+ environment with the Options Tool. To
open the Options Tool, select
File | Options form the menu. For more
information about the Options Tool and possible settings, see Section
3.1.3.
Please note that repository-specific settings are not
available in the Options Tool when opened from the Startup Launcher, as the
repository connection has not yet been established at that point.
Administrator level database operations
For more information about more advanced system administration
tasks see the ‘MetaEdit+ System Administrator’s
Guide’.


